Page History: Install Offsite Backup Manager for Windows
Compare Page Revisions
Page Revision: 14/11/2009 02:11
Downloading the Windows Software
The latest version of Webvault's offsite backup software for windows supports all major releases of Windows including XP, Vista, Windows 7, Server 2003 & 2008. The software works for both 32 bit and 64 bit operating systems. These instructions relate to version 5.5 of the backup software.
CLICK HERE to download the latest version of OBM for Windows!
Installing Offsite Backup Manager
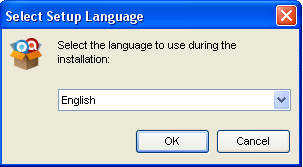
After downloading, open and run the file called obm-win.exe on your windows operating system. Select the appropriate language and click
OK.
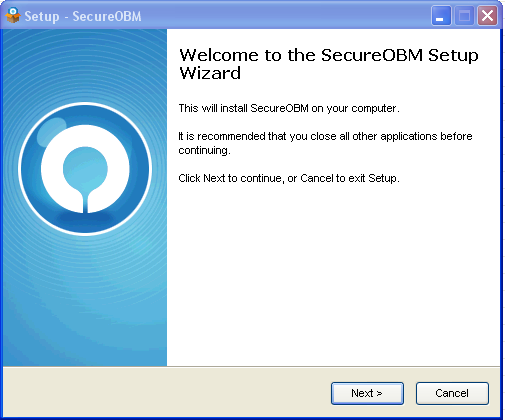
Click
Next
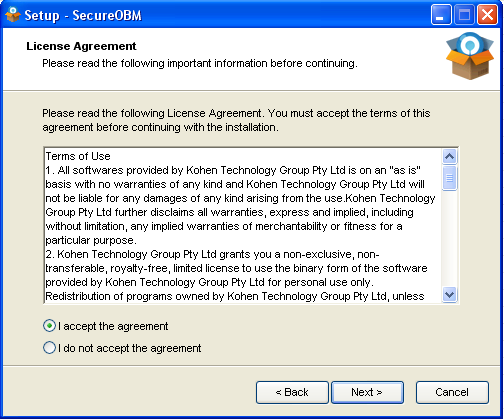
Select
I accept the agreement then click
Next
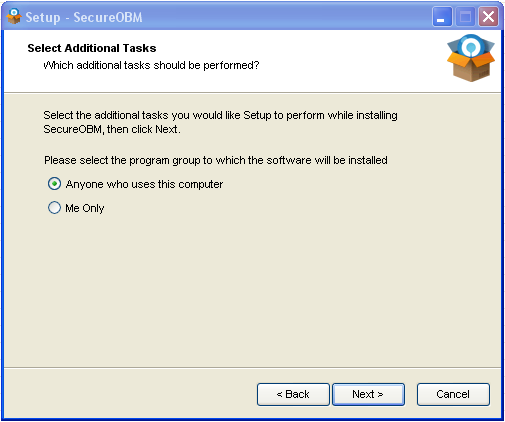
Click
Next to create install path
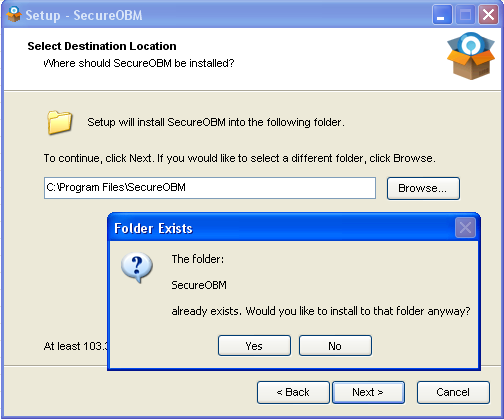
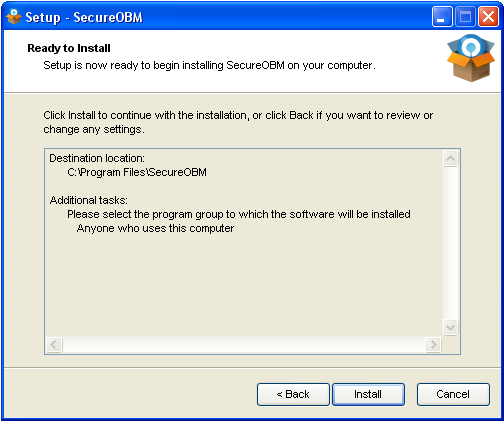
Use default settings and click
Next
Click
Next
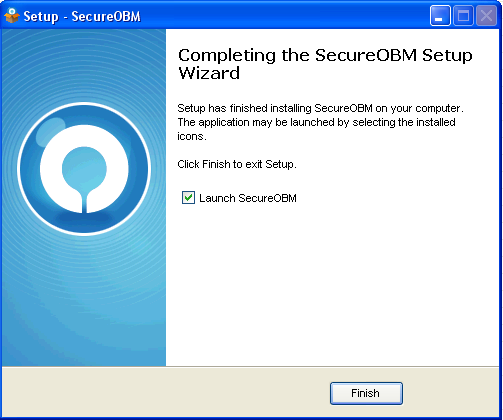
Make sure
Launch SecureOBM is ticked, then click
Next
Trial Account Registration
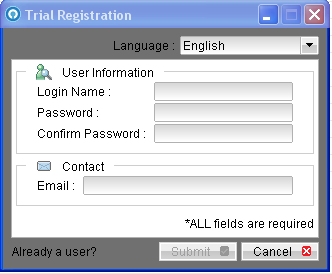
After launching the offsite backup manager software for the first time, you will see a
Trial Registration dialog window. Our backup service allows you to create your own FREE trial backup account. You can backup and secure up to 10GB of compressed data for up to 30 days at no charge.
You MUST be connected to the internet to setup your office backup account. In which case accept the default backup server connection setting. Alternatively you can choose HTTPS instead of HTTP for an secure SSL login connection. Your backup data is encrypted before it is transferred to our data centres, regardless of which connection method you choose. You can also change the server hostname if instructed by the Webvault customer support team, which is dependent on the location of our backup servers.
Then click
Next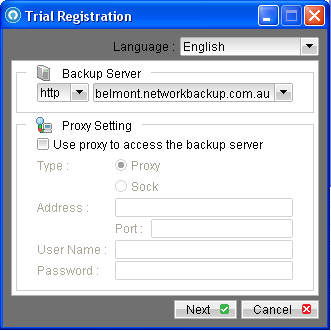
To configure a backup account, enter an appropriate
username and
password for your business, computer or server. Choose your password carefully, as by default the software will encrypt all of your backup data using your password key.
Do NOT forget your password, without this password key you will
NOT be able to restore an decrypt your backup data should you ever require it. Enter your
email address (Required). This is the email address our backup servers will use to send you reports of successful backups, backup problems or missed backup schedules.
Then click
Submit and your trial backup account will now been created.
Creating a Backup Set Profile
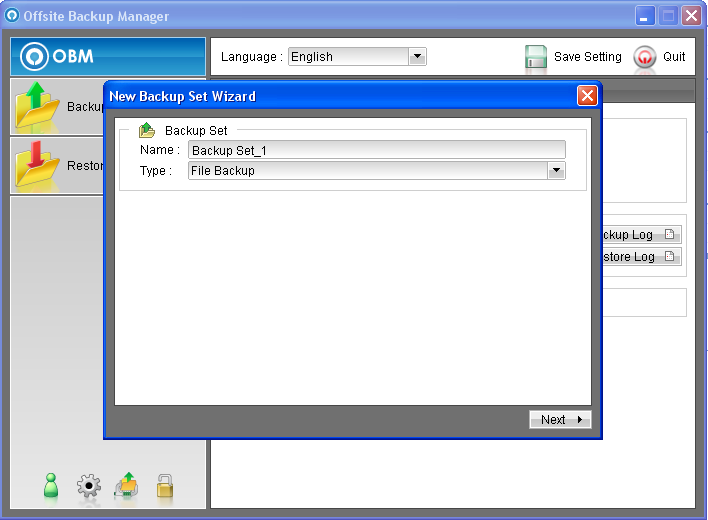
After you first connect to the offsite backup server you will be greeted with a
New Backup Set Wizard dialog window. Choose an appropriate
name for your backup set (eg. "Johns Computer"). The default backup set type is a
File Backup, which means you want to backup regular file data on your computer.
Then click
Next
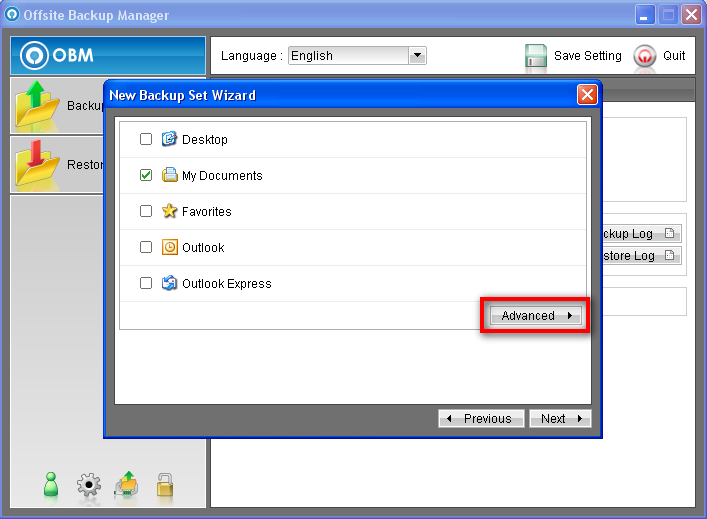
The software makes it easy to backup common folders and data on your computer. If you have documents stored in your
My Documents folders in windows or on your
Desktop you can tick these options. If you use
Microsoft Outlook or
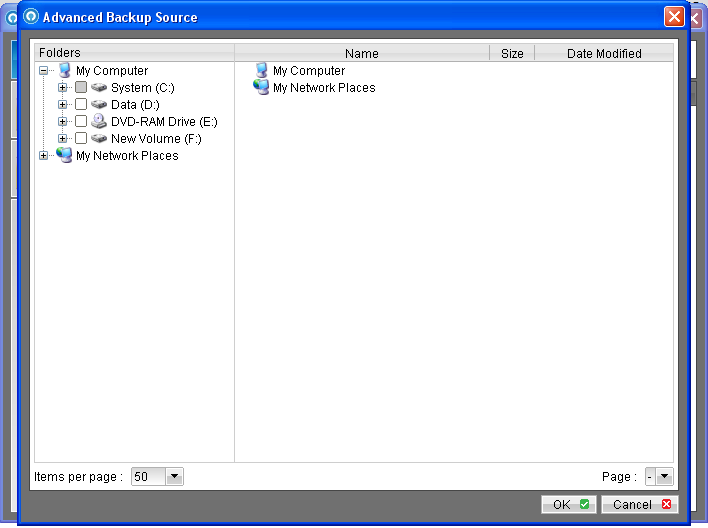
Outlook Express and wish to backup your email data, you can also select these options. If you wish to backup additional folders or files on your computer, click the
Advanced button. On the advanced backup source dialog window you can tick or un-tick the folders that you wish to backup.
Then Click
OK or
Next.
NOTE: Do NOT backup your entire C:\. In most cases your hard disk will contain too many unnecessary files that do not require an offsite backup. If you are not sure what files or folders to backup, please contact our customer support team who will be happy to offer you assistance.
Next you can decide on a day and time schedule that defines when your backup procedure should execute. By default your backup will normally run daily at 9PM (21:00 Hours). To change this day or time, click on the
Properties button. It is best to choose a time of day when you are not using your computer or the internet, so that the backup does not interupt your work.
NOTE: If you choose to run your backup very late or early in the morning, make sure you leave your computer turned on. In some cases you may need to check that the default power settings on your computer will not shutdown or put your computer into a sleep mode.
NOTE: In some cases it is recommended that you schedule a stop time for your backup (Eg. Select the Stop after option and enter 8 hours). This will ensure that a large backup procedure will not continue to run during the following work day when you may need to use your computer. For your first backup, larger amounts of data (normally above 30-40GB+) can be "seed-loaded" manually to our data centres to save time and bandwidth.
Next you can decide to use the default encryption options (
recommended). By default the offsite backup software will use your service account password that you have already created to encrypt your data. However it is possible to set a different password encryption key just for this backup set profile, or to disable encryption altogether.
NOTE: Do NOT forget your passwords! Because your data is protected using a highly secure encryption algorithm, it is NOT possible to restore your data without your password. Our staff do NOT have access to your data without knowing your password.
NOTE: It is NOT possible to change the encryption key of your backup set, even if you choose the default password option and then change your offsite backup account password later. Do NOT lose track of old passwords. If you wish to change passwords for your backup set you MUST delete the backup set and start your backup over!
Click
OK and the
OK again to complete the new backup set wizard.
To exit out of the offsite backup manager software click the QUIT button. MAKE SURE that you
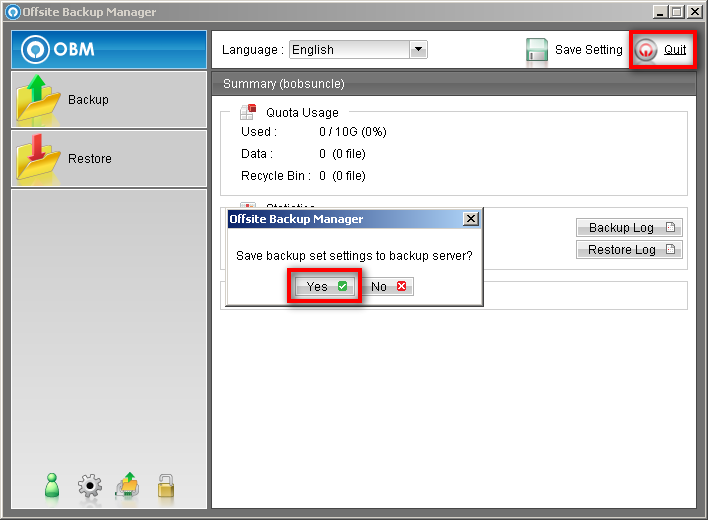
Creating a Backup Set Profile
After you first connect to the offsite backup server you will be greeted with a
New Backup Set Wizard dialog window. Choose an appropriate
name for your backup set (eg. "Johns Computer"). The default backup set type is a
File Backup, which means you want to backup regular file data on your computer.
Then click
Next
The software makes it easy to backup common folders and data on your computer. If you have documents stored in your
My Documents folders in windows or on your
Desktop you can tick these options. If you use
Microsoft Outlook or
Outlook Express and wish to backup your email data, you can also select these options. If you wish to backup additional folders or files on your computer, click the
Advanced button. On the advanced backup source dialog window you can tick or un-tick the folders that you wish to backup.
Then Click
OK or
Next.
NOTE: Do NOT backup your entire C:\. In most cases your hard disk will contain too many unnecessary files that do not require an offsite backup. If you are not sure what files or folders to backup, please contact our customer support team who will be happy to offer you assistance.
Next you can decide on a day and time schedule that defines when your backup procedure should execute. By default your backup will normally run daily at 9PM (21:00 Hours). To change this day or time, click on the
Properties button. It is best to choose a time of day when you are not using your computer or the internet, so that the backup does not interupt your work.
NOTE: If you choose to run your backup very late or early in the morning, make sure you leave your computer turned on. In some cases you may need to check that the default power settings on your computer will not shutdown or put your computer into a sleep mode.
NOTE: In some cases it is recommended that you schedule a stop time for your backup (Eg. Select the Stop after option and enter 8 hours). This will ensure that a large backup procedure will not continue to run during the following work day when you may need to use your computer. For your first backup, larger amounts of data (normally above 30-40GB+) can be "seed-loaded" manually to our data centres to save time and bandwidth.
Next you can decide to use the default encryption options (
recommended). By default the offsite backup software will use your service account password that you have already created to encrypt your data. However it is possible to set a different password encryption key just for this backup set profile, or to disable encryption altogether.
NOTE: Do NOT forget your passwords! Because your data is protected using a highly secure encryption algorithm, it is NOT possible to restore your data without your password. Our staff do NOT have access to your data without knowing your password.
NOTE: It is NOT possible to change the encryption key of your backup set, even if you choose the default password option and then change your offsite backup account password later. Do NOT lose track of old passwords. If you wish to change passwords for your backup set you MUST delete the backup set and start your backup over!
Click
OK and the
OK again to complete the new backup set wizard.
To exit out of the offsite backup manager software click the QUIT button. MAKE SURE that you
Creating a Backup Set Profile
After you first connect to the offsite backup server you will be greeted with a
New Backup Set Wizard dialog window. Choose an appropriate
name for your backup set (eg. "Johns Computer"). The default backup set type is a
File Backup, which means you want to backup regular file data on your computer.
Then click
Next
The software makes it easy to backup common folders and data on your computer. If you have documents stored in your
My Documents folders in windows or on your
Desktop you can tick these options. If you use
Microsoft Outlook or
Outlook Express and wish to backup your email data, you can also select these options. If you wish to backup additional folders or files on your computer, click the
Advanced button. On the advanced backup source dialog window you can tick or un-tick the folders that you wish to backup.
Then Click
OK or
Next.
NOTE: Do NOT backup your entire C:\. In most cases your hard disk will contain too many unnecessary files that do not require an offsite backup. If you are not sure what files or folders to backup, please contact our customer support team who will be happy to offer you assistance.
Next you can decide on a day and time schedule that defines when your backup procedure should execute. By default your backup will normally run daily at 9PM (21:00 Hours). To change this day or time, click on the
Properties button. It is best to choose a time of day when you are not using your computer or the internet, so that the backup does not interupt your work.
NOTE: If you choose to run your backup very late or early in the morning, make sure you leave your computer turned on. In some cases you may need to check that the default power settings on your computer will not shutdown or put your computer into a sleep mode.
NOTE: In some cases it is recommended that you schedule a stop time for your backup (Eg. Select the Stop after option and enter 8 hours). This will ensure that a large backup procedure will not continue to run during the following work day when you may need to use your computer. For your first backup, larger amounts of data (normally above 30-40GB+) can be "seed-loaded" manually to our data centres to save time and bandwidth.
Next you can decide to use the default encryption options (
recommended). By default the offsite backup software will use your service account password that you have already created to encrypt your data. However it is possible to set a different password encryption key just for this backup set profile, or to disable encryption altogether.
NOTE: Do NOT forget your passwords! Because your data is protected using a highly secure encryption algorithm, it is NOT possible to restore your data without your password. Our staff do NOT have access to your data without knowing your password.
NOTE: It is NOT possible to change the encryption key of your backup set, even if you choose the default password option and then change your offsite backup account password later. Do NOT lose track of old passwords. If you wish to change passwords for your backup set you MUST delete the backup set and start your backup over!
Click
OK and the
OK again to complete the new backup set wizard.
Creating a Backup Set Profile
After you first connect to the offsite backup server you will be greeted with a
New Backup Set Wizard dialog window. Choose an appropriate
name for your backup set (eg. "Johns Computer"). The default backup set type is a
File Backup, which means you want to backup regular file data on your computer.
Then click
Next
The software makes it easy to backup common folders and data on your computer. If you have documents stored in your
My Documents folders in windows or on your
Desktop you can tick these options. If you use
Microsoft Outlook or
Outlook Express and wish to backup your email data, you can also select these options. If you wish to backup additional folders or files on your computer, click the
Advanced button. On the advanced backup source dialog window you can tick or un-tick the folders that you wish to backup.
Then Click
OK or
Next.
NOTE: Do NOT backup your entire C:\. In most cases your hard disk will contain too many unnecessary files that do not require an offsite backup. If you are not sure what files or folders to backup, please contact our customer support team who will be happy to offer you assistance.
Next you can decide on a day and time schedule that defines when your backup procedure should execute. By default your backup will normally run daily at 9PM (21:00 Hours). To change this day or time, click on the
Properties button. It is best to choose a time of day when you are not using your computer or the internet, so that the backup does not interupt your work.
NOTE: If you choose to run your backup very late or early in the morning, make sure you leave your computer turned on. In some cases you may need to check that the default power settings on your computer will not shutdown or put your computer into a sleep mode.
NOTE: In some cases it is recommended that you schedule a stop time for your backup (Eg. Select the Stop after option and enter 8 hours). This will ensure that a large backup procedure will not continue to run during the following work day when you may need to use your computer. For your first backup, larger amounts of data (normally above 30-40GB+) can be "seed-loaded" manually to our data centres to save time and bandwidth.
Next you can decide to use the default encryption options (
recommended). By default the offsite backup software will use your service account password that you have already created to encrypt your data. However it is possible to set a different password encryption key just for this backup set profile, or to disable encryption altogether.
NOTE: Do NOT forget your passwords! Because your data is protected using a highly secure encryption algorithm, it is NOT possible to restore your data without your password. Our staff do NOT have access to your data without knowing your password.
NOTE: It is NOT possible to change the encryption key of your backup set, even if you choose the default password option and then change your offsite backup account password later. Do NOT lose track of old passwords. If you wish to change passwords for your backup set you MUST delete the backup set and start your backup over!
Data that is not encrypted will backup and restore significantly faster. This may be important where the security of data is less important that the time it takes to backup or restore information.
however do NOT forget your password. Click OK
to complete the new backup set wizard.
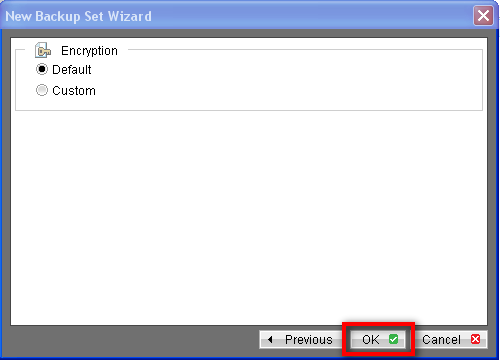
Make sure Default
is selected, and then click OK
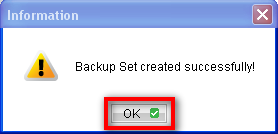
Click OK
Creating a Backup Set Profile
After you first connect to the offsite backup server you will be greeted with a New Backup Set Wizard
dialog window. Choose an appropriate name
for your backup set (eg. "Johns Computer"). The default backup set type is a File Backup
, which means you want to backup regular file data on your computer.
Then click Next
The software makes it easy to backup common folders and data on your computer. If you have documents stored in your My Document
s folders in windows or on your Desktop
you can tick these options. If you use Microsoft Outlook
or Outlook Express
and wish to backup your email data, you can also select these options. If you wish to backup additional folders or files on your computer, click the Advanced
button. On the advanced backup source dialog window you can tick or un-tick the folders that you wish to backup.
Then Click OK
or Next
.
NOTE: Do NOT backup your entire C:\. In most cases your hard disk will contain too many unnecessary files that do not require an offsite backup. If you are not sure what files or folders to backup, please contact our customer support team who will be happy to offer you assistance.
Next you can decide on a day and time schedule that defines when your backup procedure should execute. By default your backup will normally run daily at 9PM (21:00 Hours). To change this day or time, click on the Properties
button. It is best to choose a time of day when you are not using your computer or the internet, so that the backup does not interupt your work.
NOTE: If you choose to run your backup very late or early in the morning, make sure you leave your computer turned on. In some cases you may need to check that the default power settings on your computer will not shutdown or put your computer into a sleep mode.
NOTE: In some cases it is recommended that you schedule a stop time for your backup (Eg. Select the Stop after option and enter 8 hours). This will ensure that a large backup procedure will not continue to run during the following work day when you may need to use your computer. For your first backup, larger amounts of data (normally above 30-40GB+) can be "seed-loaded" manually to our data centres to save time and bandwidth.
Make sure Default
is selected, and then click OK
Click OK
Creating a Backup Set Profile
After you first connect to the offsite backup server you will be greeted with a New Backup Set Wizard
dialog window. Choose an appropriate name
for your backup set (eg. "Johns Computer"). The default backup set type is a File Backup
, which means you want to backup regular file data on your computer.
Then click Next
The software makes it easy to backup common folders and data on your computer. If you have documents stored in your My Document
s folders in windows or on your Desktop
you can tick these options. If you use Microsoft Outlook
or Outlook Express
and wish to backup your email data, you can also select these options. If you wish to backup additional folders or files on your computer, click the Advanced
button. On the advanced backup source dialog window you can tick or un-tick the folders that you wish to backup.
Then Click OK
or Next
.
NOTE: Do NOT backup your entire C:\. In most cases your hard disk will contain too many unnecessary files that do not require an offsite backup. If you are not sure what files or folders to backup, please contact our customer support team who will be happy to offer you assistance.
Next you can decide on a day and time schedule that defines when your backup procedure should execute. By default your backup will normally run daily at 9PM (21:00 Hours). To change this day or time, click on the Properties
button. It is best to choose a time of day when you are not using your computer or the internet, so that the backup does not interupt your work.
NOTE: If you choose to run your backup very late or early in the morning, make sure you leave your computer turned on. In some cases you may need to check that the default power settings on your computer will not shutdown or put your computer into a sleep mode.
NOTE: In some cases it is recommended that you schedule a stop time for your backup (Eg. Select the Stop after option and enter 8 hours). This will ensure that a large backup procedure will not continue to run during the following work day when you may need to use your computer. For your first backup, larger amounts of data (normally above 30-40GB+) can be "seed-loaded" manually to our data centres to save time and bandwidth.
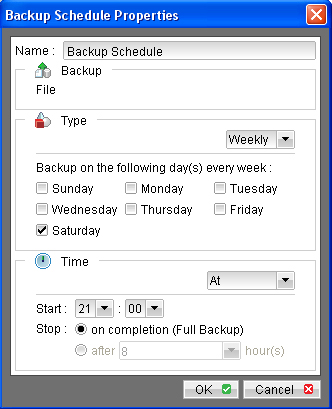
Select the Type
of backup required eg, Daily, Weekly, Monthly
, And then click Next
Make sure Default
is selected, and then click OK
Click OK
Creating a Backup Set Profile
After you first connect to the offsite backup server you will be greeted with a New Backup Set Wizard
dialog window. Choose an appropriate name
for your backup set (eg. "Johns Computer"). The default backup set type is a File Backup
, which means you want to backup regular file data on your computer.
Then click Next
The software makes it easy to backup common folders and data on your computer. If you have documents stored in your My Document
s folders in windows or on your Desktop
you can tick these options. If you use Microsoft Outlook
or Outlook Express
and wish to backup your email data, you can also select these options. If you wish to backup additional folders or files on your computer, click the Advanced
button. On the advanced backup source dialog window you can tick or un-tick the folders that you wish to backup.
Then Click OK
or Next
.
NOTE: Do NOT backup your entire C:\. In most cases your hard disk will contain too many unnecessary files that do not require an offsite backup. If you are not sure what files or folders to backup, please contact our customer support team who will be happy to offer you assistance.
You must decide on a day and time schedule about how to run your backup set procedure. By default your backup will normally run daily at 9PM (21:00 Hours). To change this day or time, click on the Properties
button. It is best to choose a time of day when you are not using your computer or the internet, so that the backup does not interupt your work or the speed of your internet. If you choose to run your backup very large or early in the morning, make sure you leave your computer turned on. In some cases you may need to check that the default power settings on your computer will not shutdown or put your computer into a sleep mode.
NOTE: It is highly recommended that for the initial backup, that you schedule a stop time for your backup (Eg. Select the Stop after option and enter 8 hours). This will ensure that should you have a lot of data to upload that the backup will not continue to run during the following work day. Large amounts of data, normally above 30-40GB+ can also be "seed-loaded" manually to our data centres for the initial backup saving valuable time and bandwidth.
Select the Type
of backup required eg, Daily, Weekly, Monthly
, And then click Next
Make sure Default
is selected, and then click OK
Click OK
Creating a Backup Set Profile
After you first connect to the offsite backup server you will be greeted with a New Backup Set Wizard
dialog window. Choose an appropriate name
for your backup set (eg. "Johns Computer"). The default backup set type is a File Backup
, which means you want to backup regular file data on your computer.
Then click Next
The software makes it easy to backup common folders and data on your computer. If you have documents stored in your My Document
s folders in windows or on your Desktop
you can tick these options. If you use Microsoft Outlook
or Outlook Express
and wish to backup your email data, you can also select these options. If you wish to backup additional folders or files on your computer, click the Advanced
button. On the advanced backup source dialog window you can tick or un-tick the folders that you wish to backup.
Then Click OK
or Next
.
NOTE: Do NOT backup your entire C:\. In most cases your hard disk will contain too many unnecessary files that do not require an offsite backup. If you are not sure what files or folders to backup, please contact our customer support team who will be happy to offer you assistance.
You must decide on a day and time schedule about how to run your backup set procedure. By default your backup will normally run daily at 9PM (21:00 Hours). To change this day or time, click on the Properties
button. It is best to choose a time of day when you are not using your computer or the internet, so that the backup does not interupt your work or the speed of your internet. If you choose to run your backup very large or early in the morning, make sure you leave your computer turned on. In some cases you may need to check that the default power settings on your computer will not shutdown or put your computer into sleep mode.
Select the Type
of backup required eg, Daily, Weekly, Monthly
, And then click Next
Make sure Default
is selected, and then click OK
Click OK
Creating a Backup Set Profile
After you first connect to the offsite backup server you will be greeted with a New Backup Set Wizard
dialog window. Choose an appropriate name
for your backup set (eg. "Johns Computer"). The default backup set type is a File Backup
, which means you want to backup regular file data on your computer.
Then click Next
The software makes it easy to backup common folders and data on your computer. If you have documents stored in your My Document
s folders in windows or on your Desktop
you can tick these options. If you use Microsoft Outlook
or Outlook Express
and wish to backup your email data, you can also select these options. If you wish to backup additional folders or files on your computer, click the Advanced
button. On the advanced backup source dialog window you can tick or un-tick the folders that you wish to backup.
Do NOT backup your entire C:\. In most cases your hard disk will contain too many unnecessary files that do not require an offsite backup. If you are not sure what files or folders to backup, please contact our customer support team who will be happy to offer you assistance.
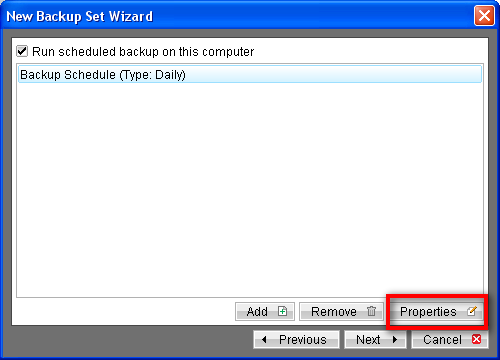
Click Properties
to setup the backup schedule
Select the Type
of backup required eg, Daily, Weekly, Monthly
, And then click Next
Make sure Default
is selected, and then click OK
Click OK
Creating a Backup Set Profile
After you first connect to the offsite backup server you will be greeted with a New Backup Set Wizard
dialog window. Choose an appropriate name
for your backup set (eg. "Johns Computer"). The default backup set type is a File Backup
, which means you want to backup regular file data on your computer.
Then click Next
The software makes it easy to backup common folders and data on your computer. If you have documents stored in your My Document
s folders in windows or on your Desktop
you can tick these options. If you use Microsoft Outlook
or Outlook Express
and wish to backup your email data, you can also select these options. If you wish to backup additional folders or files on your computer, click the Advanced
button. On the advanced backup source dialog window you can tick or un-tick the folders that you wish to backup.
Do NOT backup your entire C:\. In most cases your hard disk will contain too many unimportant files to backup effectively offsite. This backup solution is designed primarily to protect only your important data, not software you can easily obtain or reinstall after a disaster. If you are not sure what file or folders to backup, please contact our customer support team who will be happy to offer you assistance.
Click Properties
to setup the backup schedule
Select the Type
of backup required eg, Daily, Weekly, Monthly
, And then click Next
Make sure Default
is selected, and then click OK
Click OK
Creating a Backup Set Profile
After you first connect to the offsite backup server you will be greeted with a New Backup Set Wizard
dialog window. Choose an appropriate name
for your backup set (eg. "Johns Computer"). The default backup set type is a File Backup
, which means you want to backup regular file data on your computer.
Then click Next
The software makes it easy to backup common folders and data on your computer. If you have documents stored in your My Document
s folders in windows or on your Desktop
you can tick these options. If you use Microsoft Outlook
or Outlook Express
and wish to backup your email data, you can also select these options. If you wish to backup additional folders or files on your computer, click the Advanced
button. On the advanced backup source dialog window you can tick or un-tick the folders that you wish to backup.
Do NOT backup your entire hard disk C:\. In most cases your windows hard disk will contain too much non-critical data to backup effectively. The offsite backup service is designed to protect only your important data, NOT software you can easily obtain or reinstall after a disaster.
Click Properties
to setup the backup schedule
Select the Type
of backup required eg, Daily, Weekly, Monthly
, And then click Next
Make sure Default
is selected, and then click OK
Click OK
Creating a Backup Set Profile
After you first connect to the offsite backup server you will be greeted with a New Backup Set Wizard
dialog window. Choose an appropriate name
for your backup set (eg. "Johns Computer"). The default backup set type is a File Backup
, which means you want to backup regular file data on your computer.
Then click Next
The software makes it easy to backup common folders and data on your computer. If you have documents stored in your My Document
s folders in windows or on your Desktop
you can tick these options. If you use Microsoft Outlook
or Outlook Express
and wish to backup your email data, you can also select these options. If you wish to backup additional folders or files on your computer, click the Advanced
button as shown.
Click Properties
to setup the backup schedule
Select the Type
of backup required eg, Daily, Weekly, Monthly
, And then click Next
Make sure Default
is selected, and then click OK
Click OK
Creating a Backup Set Profile
After you first connect to the offsite backup server you will be greeted with a New Backup Set Wizard
dialog window. Choose an appropriate name
for your backup set (eg. "Johns Computer"). The default backup set type is a File Backup
, which means you want to backup regular file data on your computer.
Then click Next
Tick My Documents
, However if you wish to back up more files click Advanced
and tick which ever files you wish to include in the backup
Click Properties
to setup the backup schedule
Select the Type
of backup required eg, Daily, Weekly, Monthly
, And then click Next
Make sure Default
is selected, and then click OK
Click OK'